


A Journey From ESXi to Proxmox In Three Acts
Part 2 - Are You Down With POC? (Yea You Know Me)

Previously On…
As discussed in Part 1, I went over the why and hows of my I was going to consider Proxmox as my hypervisor going forward. Now, the next step was to test and evaluate, before committing. And just like any good pre-sales engineer would do, it was time to kick off a POC! (Proof Of Concept) Now keep in mind, this is my journey. It’s what I researched and tested and works in my humble home environment. I’m sure some will find issues with some of the decisions I made along with methodologies and that’s fine.
Note: EVE and PNET are separate products, with PNET being a fork of EVE. I have no interest in the religious argument between the two, I use what works. And at the time of this writing I find PNET to be more stable, with a host of quality of life improvements that make my life easier. Use what works for you, the following process is interchangeable between the two.
POC Deliverables
In order to make my decision, I had the following requirements to fulfill.
Install Process Evaluation
Post Install Evaluation: Networking, Disks, Clustering
Testing: Backups, Migration, VM Creation
Backup Processes
Existing VMware VM export and Import Process.
Plan for a migration of all VMs with no interruption of currently running network services. (Plex, Firewall, Home Assistant, etc)
Test Plan
It was quickly obvious that the best way to run this POC was on EVE/PNET. Proxmox is simply Linux, which means I could simply use a custom Linux template to get going.
Could I have used VMWare workstation for this POC, or even Desktop Hyper-V? Yes, but I wanted to be able to tag traffic and Windows Pro has not supported DOT1.Q for a long time, if ever.
Note: As mentioned in Part1, your lab server must be bare metal with all the proper virtualization settings enabled in the BIOS.
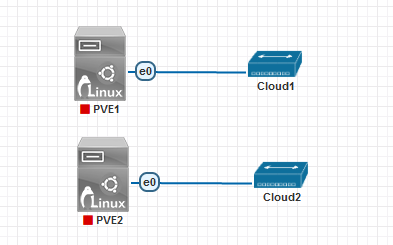
I want to to be able to directly address the servers on my production network, so I will be using cloud interfaces to bridge the servers directly from PNET to my prod switch.
The setup looks like this:

For setup, management will be on standard access ports, and I setup the trunk post-install. PVE does not support tagging the management traffic at install.
Custom Linux Template For Lab Server Use
To get the custom Linux template created, I SSHed into the lab server, cd’ed to:/opt/unetlab/addons/qemu and created the folder: linux-proxmoxand ran the following command to create the disk image.
Then, I cd into /opt/unetlab/addons/qemu/linux-proxmox /opt/qemu/bin/qemu-img create -f qcow2 virtioa.qcow2 100G
Finally, I downloaded the Proxmox ISO and renamed it cdrom.iso, and uploaded it to the directory. The template was then ready for use. I have a robust lab server, so I am going to give each server 10CPU and 32GB of RAM. (simulating my current production server capacity)
I started the node and accessed the console.
Install and Setup

I started the install, and agreed to the EULA . I learned to not rush past this next step though because this is the first chance I get to save you same real pain.

Click options. You absolutely want to set your max root. This value is in GB, and it will format this part of the disk for the OS, ISOs, etc. You won’t be able to store VMs here, and failure to set this will format the entire disk this way. I found it very difficult to change this without a reinstall of the entire server.
Setting the max root will leave the rest of the disk available for thin-disk provisioning. So here out of 100GB I’m going to use 20GB.

Next, I set the time, password and network settings. As mentioned previously, the default is untagged.

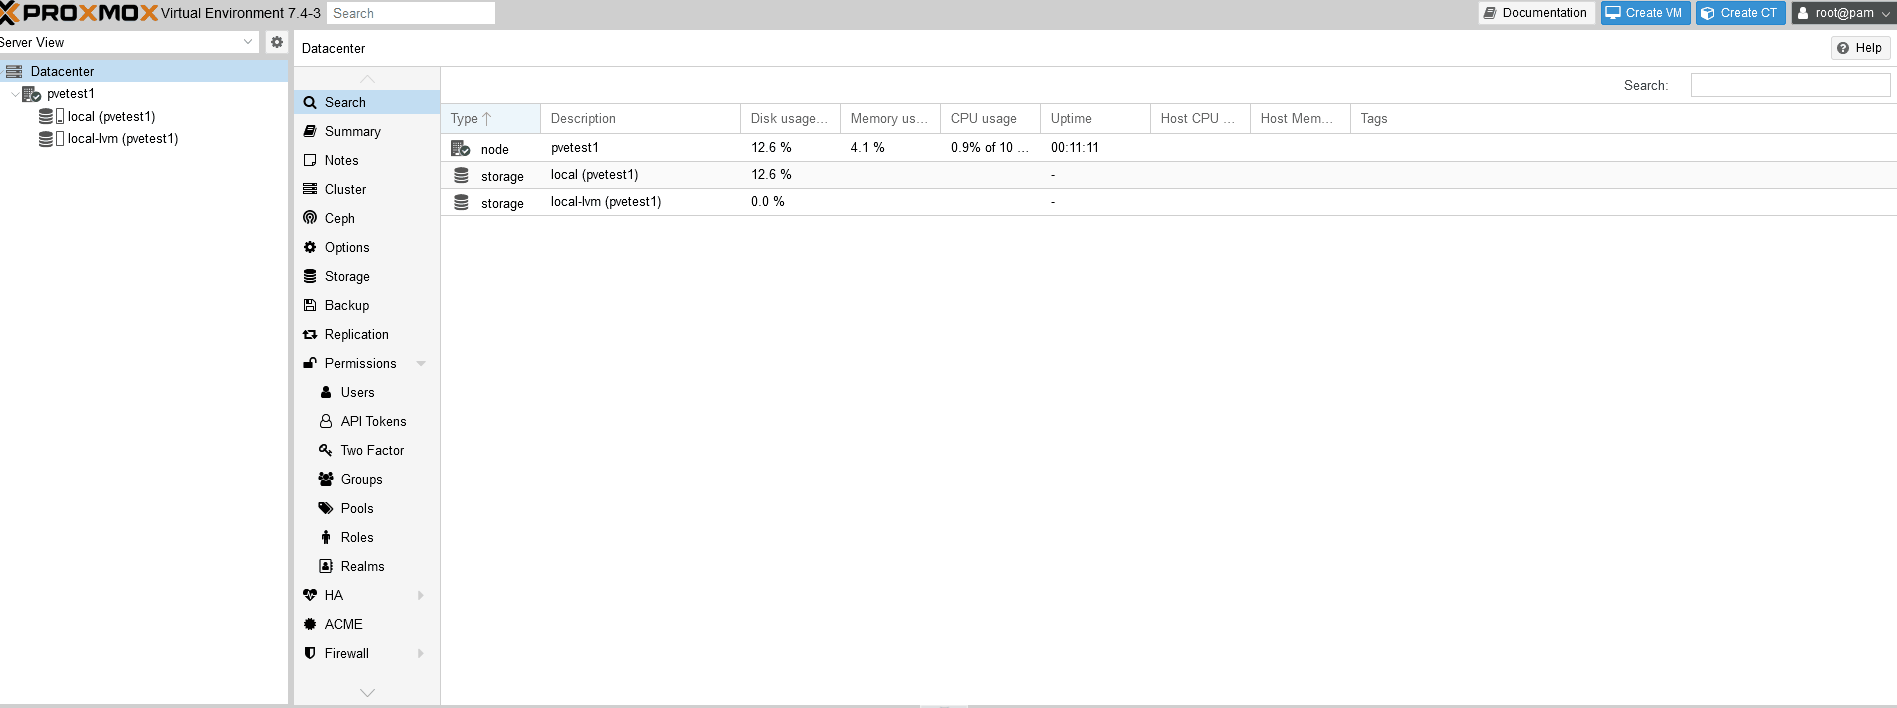
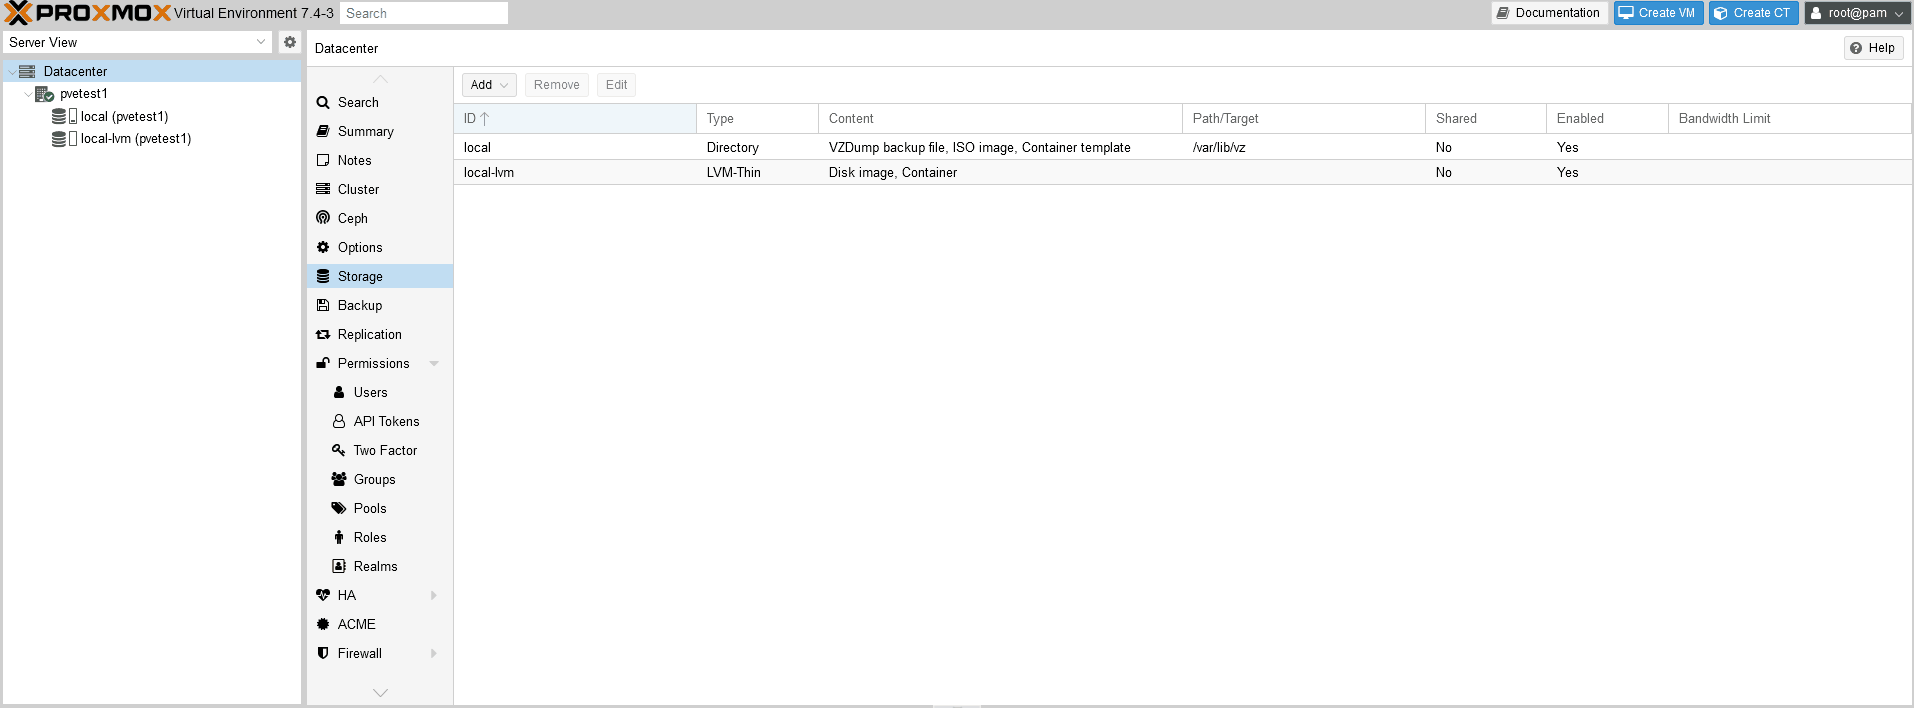
I confirmed settings and reboot, then logged in. (click past the nag warning about the subscription, we’ll deal with that later.) Right away we’re treated to a beautiful sight.
Pay attention to the gif (hard “G”, you maniacs) and note the types of files you can store on “local” and “local-lvm”. The local-lvm is a thinpool for storing the VMs. The local us for backups, templates, and ISOs.
While I could upload ISOs direct, I am going to connect to my NFS share on my Synology to upload ISOs to it. Notice the file types on the NFS setup. You can store VMs there, but they won’t have snapshot capabilities unless you created them in the qcow format. You can do a storage move on the virtual hard disk and convert if desired. I show how to do a storage move later in the document.
More details on the filesystems on their capabilities can be found here.
The ISO is uploaded, but next I need to get the server management traffic tagged and the virtual switch changed to a trunk. Then my connection to the switch can support tags to other vlans.

Networking!
Now if you’re used to VMware Vswitch, this may be a bit of a learning curve but it’s not too terrible.
There’s three primary constructs for the network config:
Linux Bridge - analogous to a vswitch
Linux Bond - for teaming/LACP (covered in Part3)
Linux Vlan - Layer 3 interface. (we will be setting this up for mgmt)
So what I did is remove the IP from the Bridge, and check the “Vlan Aware” option. This will essentially set the bridge to trunk mode.
Then, I created a Linux VLAN and assigned it to an IP and then tagged it correctly. I can perform all these steps right away nothing takes effect until I hit “apply.”
Note: As Proxmox is pure Linux, it’s also easy to un-break this config since you can console in and edit the config file directly via: /etc/network/interfaces run ifreload -a after editing manually for changes to take effect
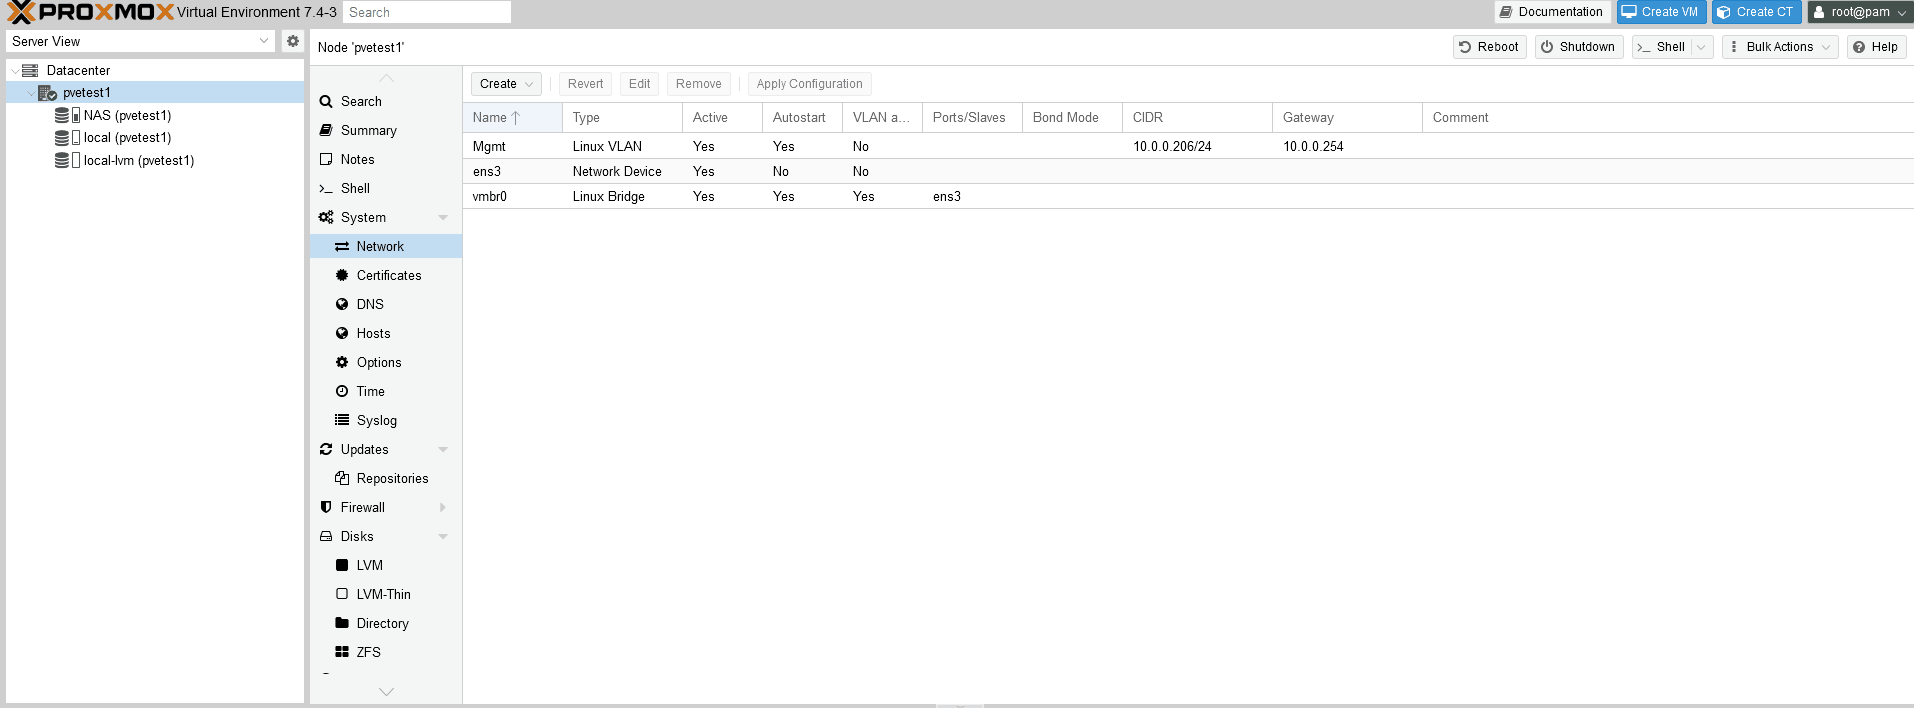
Here’s what the current config looks like, for reference.


The management page doesn’t always recover, so after a successful ping refresh and if done correctly it will come up. Here is the post config in /etc/network/interfaces

Not too bad, right? Ok, before we get onto our first VM, let’s take care of that nag message.
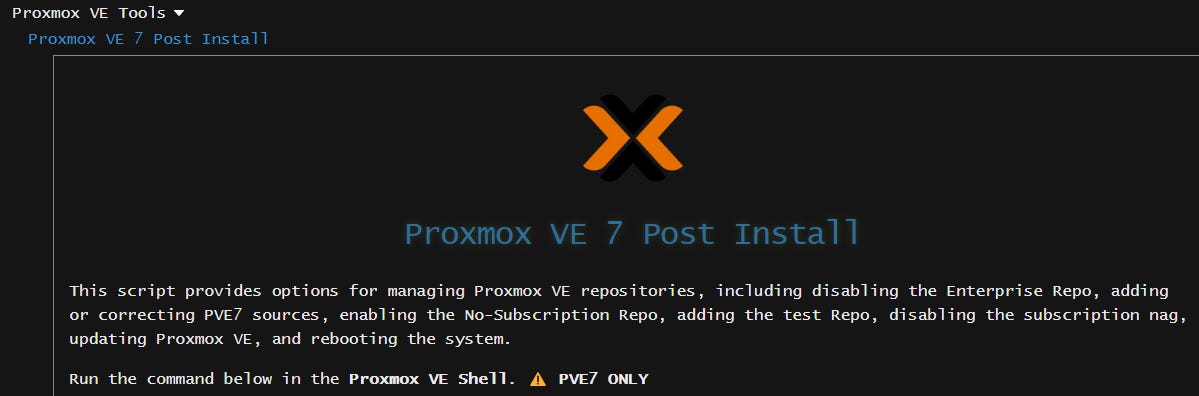
Post-Install Scripts
The scripts found at the site: https://tteck.github.io/Proxmox/
I ran the post-install script on both nodes and answered yes to everything and rebooted. Nag message begone!
Cluster-FAQ
Ok, I lied. I have one more thing to setup before the inaugural VM, and that’s clustering. This will enable shared storage between nodes, and also live migrations. There is no “cluster master”, everyone syncs settings via “corosync”. It’s super simple to setup. On one of the nodes the cluster gets created, then the other one joins it.
Gotcha: The node joining the cluster must not have VMs running or registered on it prior to join. There’s a workaround, but its a PIA.

One the joinee becomes a member, refresh the page to log in again. The cluster can be managed from any node, as there is no master. It’s pretty great. Note how the new member automatically has access to the NFS share.
Virtual Insanity
Ok, let’s get a VM up and running! I then right click on a node and “Create VM”
Note: We are going to use paravirtualized NIC drivers and SCSI for Windows. We’ll need the virtio drivers from here mapped to an CD via ISO that was uploaded to PVE.


(I’ll add the virtual CD disks later)

I’m using UEFI, and storing the disk locally. Also checking “Qemu Agent” which will be installed later.

I checked “discard” for thin disk support to reclaim space as files are deleted in the VM.


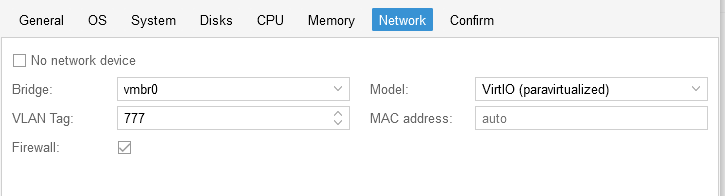
Using my VLAN tag, and you can leave “firewall” checked. PVE has a firewall feature but it doesn’t do anything unless a rule is created. I chose VirtIO (will require driver)
Confirm and finish.
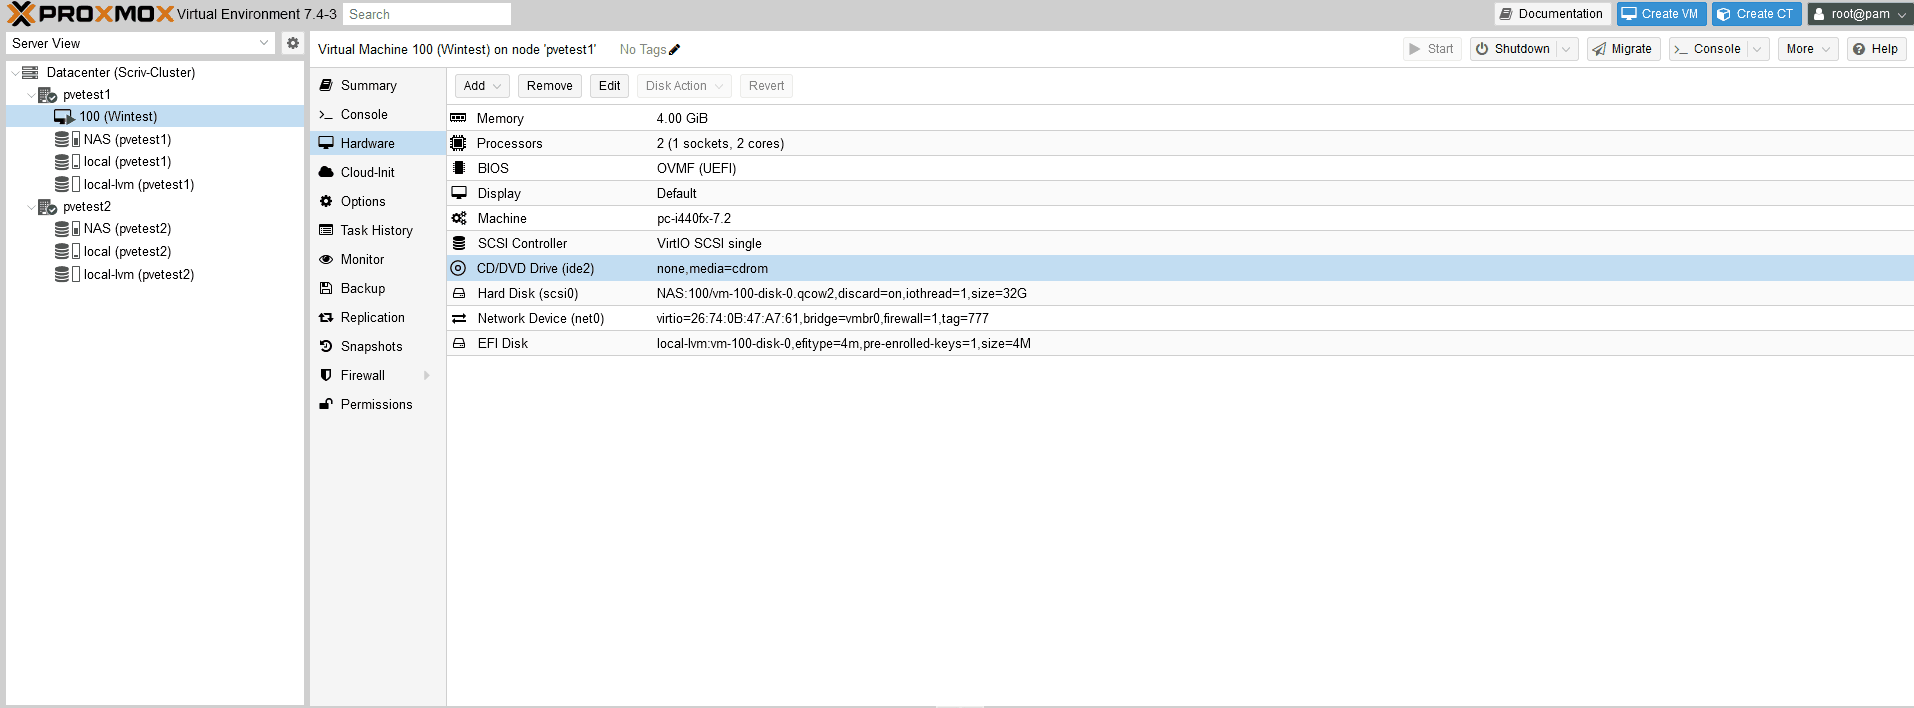
I deleted the CD and added two SATA drives for the OS and drivers with the OS first.

I edited the boot order to put the Windows ISO first. I also made a mistake and saved the HDD to the NFS share. Let’s fix that. This the disk migration utility and for the format of the disk can changed for most VMs. (GIF edited for time)
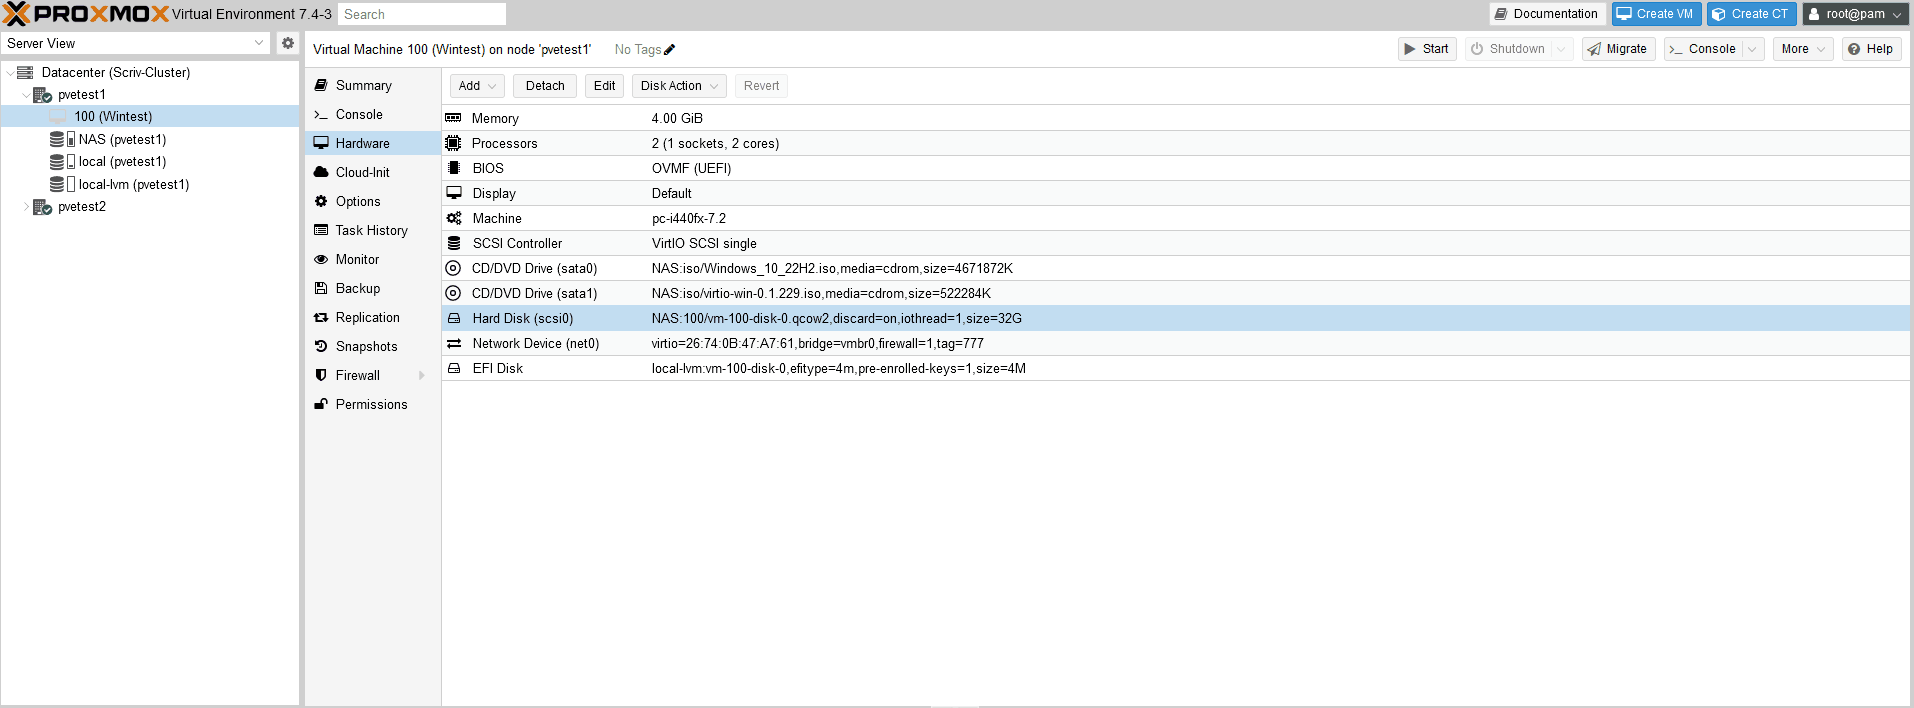

I clicked “load driver” via the VirtIO ISO.


Then started the windows install and got some coffee.
Post Install Tasks and Testing
I then installed the guest tools from the VirtIO CD to finish installing drivers and the guest agent.
Note: Linux Distros have these drivers built in. The guest agent may need to be installed however.

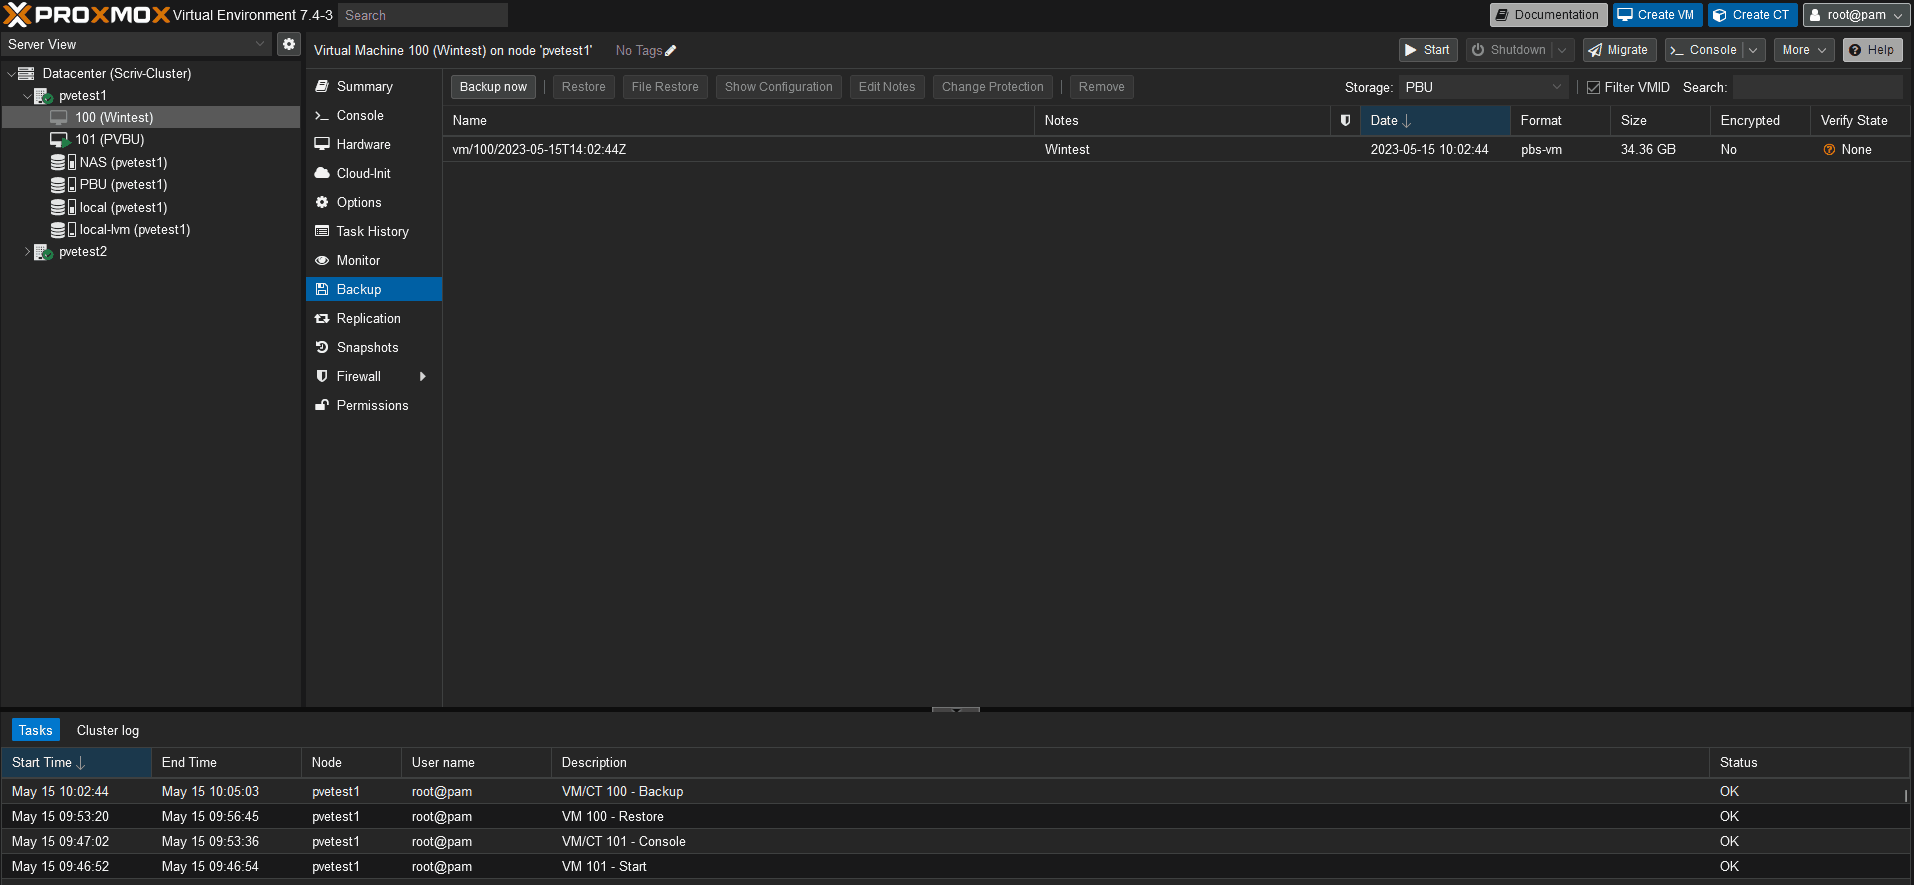
Ok, let’s test the backup.

I’m going to back up locally for now.


Let’s let this run.
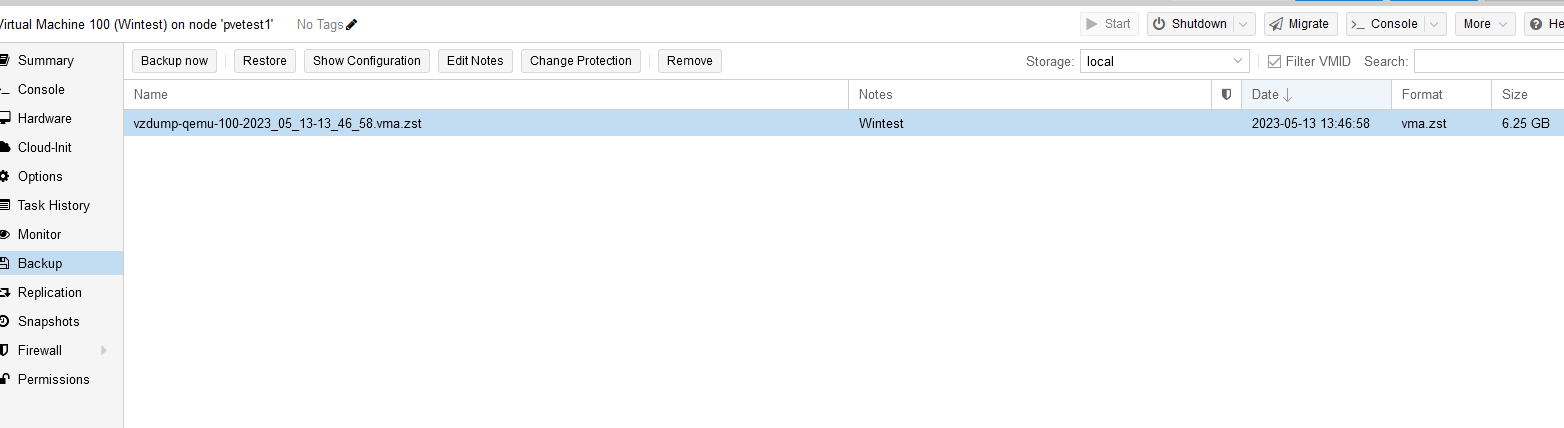
Great, there’s a backup. Let’s delete the VM and restore.


Let’s let this run.

The restore was successful. If we look at the Datacenter level, we can also schedule backups.

So far so good. Now the thing about backups done from Proxmox directly is that they are always full backups, not incremental. To be fair, even if your disk is 100GB and you’re only using 20GB, Proxmox is smart enough to only backup those blocks. However, with incremental backup support subsequent backups could be smaller still. You also cannot do a “live” restore. Uh..oh. Live restore is a requirement and incremental backups sure would be nice.
I guess the POC is over. Failed, done, it’s a wrap, people! Whomp, whomp.
 - IMDb")
WAIT!!
You know what can do these things though? The FREE Proxmox Backup Server! The POC is saved! We will come back to this soon.
For now, lets test a live migration between PVE1 and PVE2. I have replicated the same network settings between the two. (GIF edited for time)
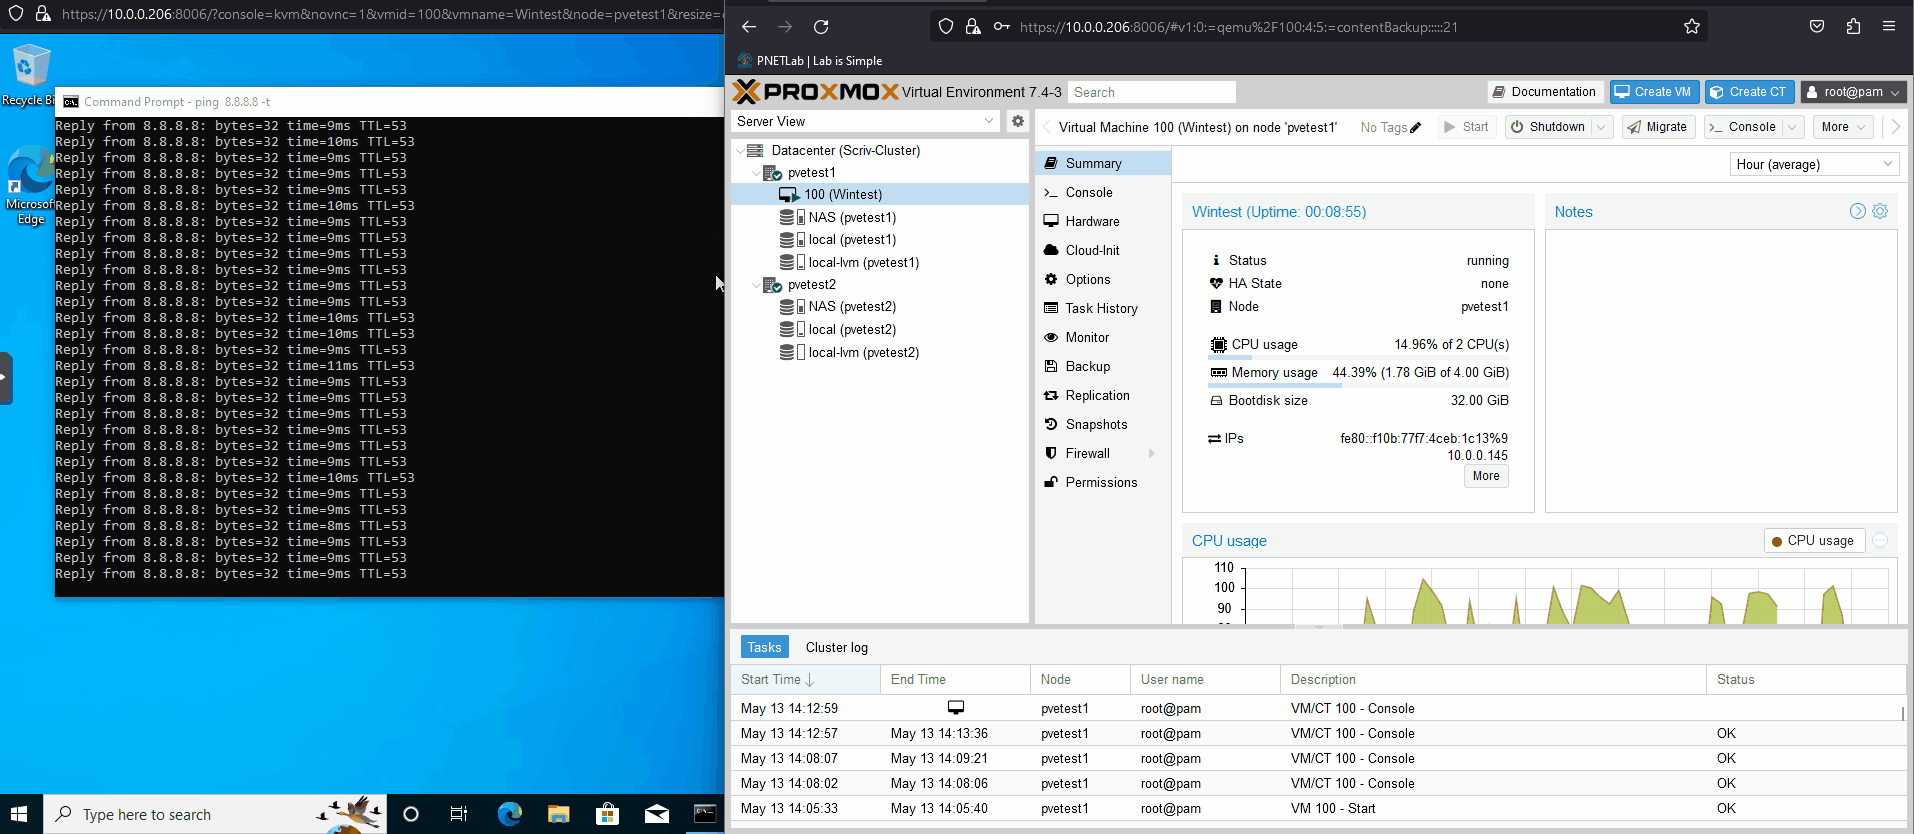
The migration was successful!
So far the POC has been successful on install, migration, backup, and network testing.
Let’s focus on the Proxmox Backup Server next! We’re almost done with the POC!
Back That Thang Up (With Proxmox Backup Server)
PBU is a free standalone server just for backups. The primary advantage of running PBU is that it will enable incremental, block level backups as well as live restore of backed up VMs.
I’m not going to get too deep into the install, as it’s really straightforward. Don’t worry about the disk issue from previously mentioned for PVE, it’s not relevant here.
Note: our friend tteck also has a post-install script for PBS! I ran that after install and rebooted.
Now, for most other installs the recommend use case is that PBU be installed on a bare metal server with SSD storage. For enterprise, absolutely. For my little network, I installed PBU ON PVE and then used NFS to store the backups.
You may be thinking , “Wait. WAIT! You installed the backup server on the node you are doing backups from?! Heresy, stupidity!” In an enterprise environment I’d be inclined to agree. But this works for me, and I’ll go into more detail in Part 3 as to why.
By far the trickiest part of this entire journey was getting NFS to work on PBU. There is no GUI to add a NFS share, as Proxmox does not view it as a best use case for performance and other reasons. It has to be done via cli.
And just like reading from the Necronomicon, it must be done precisely or you’re going to get deadites.
I’m not going to get into the minutiae of setting up NFS on remote storage because it’s a little different for each vendor. I’m using Synology in my case. Google is truly your friend here.
Setting Up the Datastore
Ok now I researched and tested my NFS shares, I’m going to setup the datastore.
I needed to first setup the mount directory:mkdir /mnt/synology
Then, set owner and permissions to the built in backup user:chown backup:backup /mnt/synology
chmod 770 /mnt/synology
Next, I edited fstab with nano and added the mount info and parameters:nano etc/fstab/
[IP]:/volume2/pbstest /mnt/synology nfs vers=4,nouser,atime,auto,retrans=2,rw,dev,exec 0 0
Now, I mounted the drive and used the flag for verbose input:mount -a -v
Finally, if everything went right I created the datastore.:proxmox-backup-manager datastore create NAZ /mnt/synology
I then saw the chunk process start building, finish and the datastore appeared in the GUI.

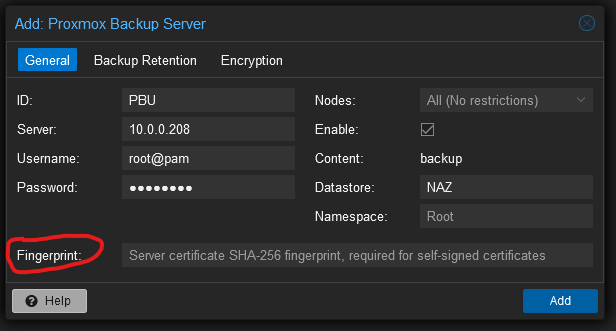
Now that the datastore is complete, it needs to added in the PVE cluster as storage. backups are not started in PBU, but in PVE.

Here, I filled out everything for the server connection but I need the fingerprint from PBU. You can get it on the PBU dashboard.

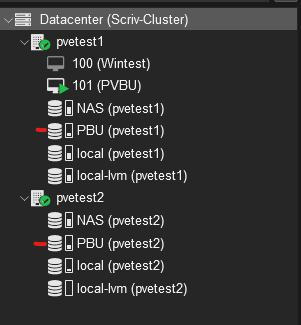
Once complete, you’ll see it on the storage list as a destination.
I’ve already run a test backup, it was successful.

Now I’m going to delete it and attempt a live recovery. The VM may have reduced performance due to the nature of the recovery method until it’s complete. (Gif edited for time, also substack was cranky about the size, so I had to decrease the size which made it choppy)
The live restore was (very) successful and much faster than with Veeam. It’s almost magical when you can mess up your firewall with tinkering and be back up and running on 30 seconds with a live restore.
VM Migration and Testing
I’m not going to get into this deeply at all. The PVE guide is fantastic for V2V migration.
https://pve.proxmox.com/wiki/Migration_of_servers_to_Proxmox_VE
If there’s one hint I can give that isn’t spelled out, use the OVF tool to connect to your server without any VMs in the argument. Then you can accept the cert and store it for the session. Then the export with the VM in the argument should work just fine.
I installed the OVF tool right on PVE.
Once I migrated over some VMs from ESXi to PVE, I shutdown the ESXi VMs and fired up the PVE version and it worked beautifully.
IT’S DONE.
This was a successful attempt and gave me enough information to warrant going forward replacing everything on the production network. I also found some new interesting swear word combinations along the way.
The final act will be about the process of migrating into production.
Nice job Nathaniel!!!