


MQTT and Home Assistant, Part 1
Best Thing Since Chocolate Met Peanut Butter

MQTT Overview
Part2
When I first started with Home Assistant almost 10(!) years ago MQTT wasn’t as front and center as it is now, and I was first exposed to it when I decided to move from ZHA (Zigbee Home Automation) to ZigbeeToMQTT. (Z2M) Even then, the use case for what MQTT is and its other uses cases weren’t exactly clear to me. Z2m abstracts it away to a point of it works for that use case, but not as clearly for others.
And while I like Z2M a great deal, one thing bothered me about it is that I didn’t truly understand what it was or how to troubleshoot it. And the guides I found, while they obviously got me up and running, never really explained anything. Sounds like a perfect excuse to go on rambling about some nonsense.
If you want an exhaustive overview, go check out mqtt.org. The high level explanation is that MQTT is a publisher/subscriber message system. Essentially, let’s take incoming Zigbee messages and convert them to MQTT so they can be more generically understood. It lessens the proprietary nature of Zigbee and opens it up for more interoperability. This will become clearer as we go.
MQTT Concepts
1. Ground Control To Major Tom
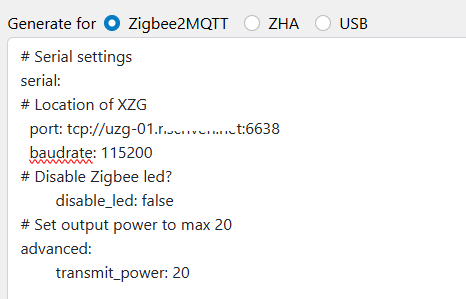
So, let’s talk about what we need to understand to get going. First, we need something to send received Zigbee traffic to our Hub. This can be a USB device such as a Sonoff or Conbee2/3, or a LAN coordinator like my personal favorite, the UZG-01. That last one is super interesting as it has an ESP32 along with a CC2652P ZigBee radio that allows Zigbee to be sent directly to the ESP32 for the received/sent traffic to be sent over the LAN to your HUB as MQTT.

2. What’s Your Vector, Victor?
OK great. Now we’re receiving and formatting Zigbee traffic as MQTT messages. Congratulations , you’re the dog that caught the car. Now what do you do with it? You need to send it to a broker, that’s what. The broker is responsible for receiving those messages and distributing them. And this is where it gets a bit confusing in Home Assistant, because actually two MQTT related pieces are required, an add-on paired with an integration.
I’m using HAOS, which is the VM install. So add-ons are installed on an internal Docker. Understanding this makes the process a bit simpler to grasp. The broker service (Mosquitto broker) is a docker application, as is Z2M.
The integration (MQTT) is the application that will subscribe to the broker and then create/manage all the entities HA will create for automation. In the middle is Z2M (another add-on), which takes all the data from the endpoints and sends it to the broker. The flow looks like this:
Coordinator (USB or LAN)>Z2M>Broker>MQTT>HA
Now that the general concepts are outlined, let’s talk about install.
Install and Configuration
Broker Install

Once installed, go look at the configuration tab.

I made an admin user called “mqtt” with an obnoxiously long password. This will allow you to require authentication so you can control who can connect.
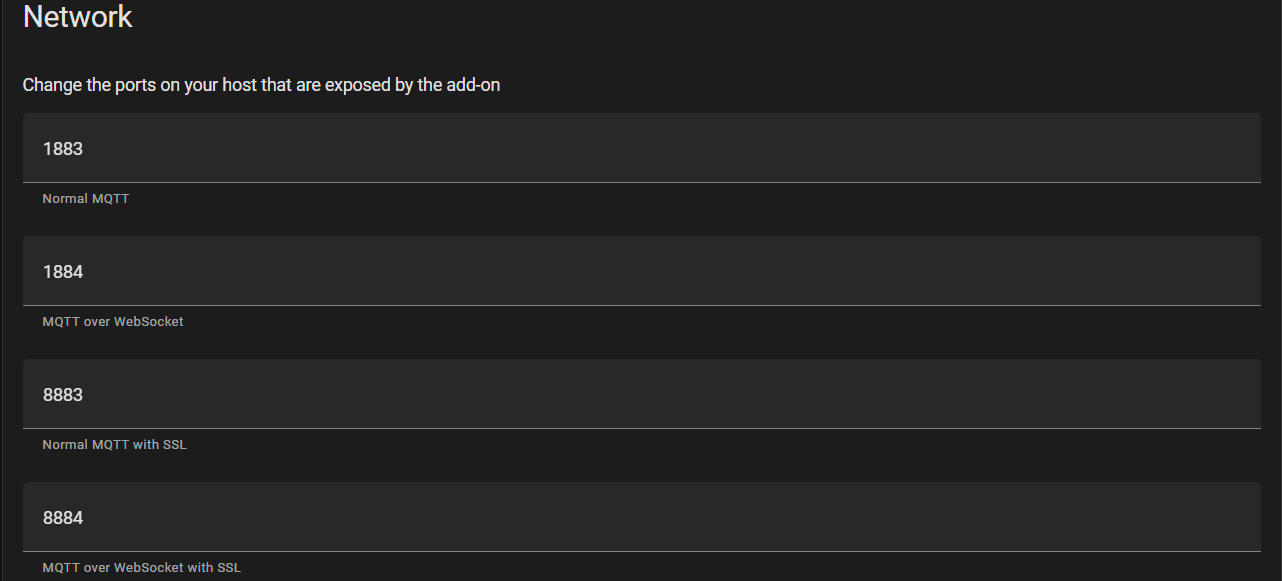
Take note of the ports that are exposed. The majority of you will be utilizing 1883. So whenever you need to use this it’ll be the IP or FQDN of your HA install on port 1883. Go ahead and start-the add-on.
Let’s take a peek at the log.

Very useful to troubleshoot a connection issue. We’ll get into this later in the troubleshooting section.
MQTT Integration Install
Once the broker is installed, go to the Settings>Devices& Services section. Through the magic of HA, it has already discovered the broker!


Let’s look at the logs in the broker.

Hold on there, the user that was auto configured was home assistant, and I don’t know that password. Let’s change that. For my demo system, I created a user called “test” so let’s use that. For yours, I recommend a user like “mqtt” with an obnoxiously long password. Ok, let’s go to the MQTT integration.


Now let’s go look at the broker logs again.

Very nice. Let’s finish this section with a tool that will let us connect to the MQTT broker itself, MQTT Explorer. You can install it as an add-on or use a desktop client.
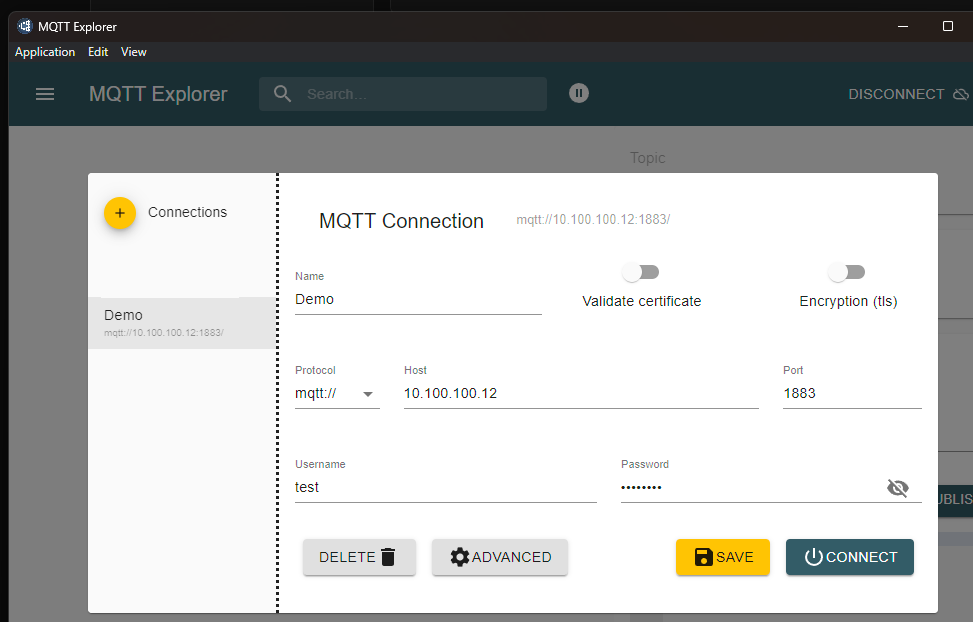
Put in the IP, username and password, hit connect.

Initially, there’s not much to see here but you can explore the basic structure. There will be much more to look at there shortly. You now have a fully functional battlestation MQTT infrastructure in Home Assistant!
In the next section we’ll cover the install and configuration of Z2M, as well as other services that can use MQTT, and some basic troubleshooting steps.
Until next time.