


MQTT And Home Assistant Part 2
Z2M!

In MQTT Part 1, we went over how to set up and configure MQTT for future use. Now, let’s look at some apps that we can install to use this functionality. Let’s start with the big one.
Zigbee2MQTT (Z2M)
A Short History
When I first started with home automation back with Wink and the SmartThings, my first USB dongle was the ConbeeII. Solid little Zigbee dongle, the integration was DeConz. Over time however that started to show its age and for me was wildly unreliable.
That’s when I learned I was not stuck with that integration. There are several ways to manage and control a zigbee network. So then I moved to ZHA (ZigbeeHome Automation) for a few years. While much better than DeConz it did require that I re-pair all my devices. The network was more stable, but I did notice a bit of a lack of control/visibility. As my device count grew though, I was starting to outgrow the ConbeeII, and at this point it was pretty damn old.
I needed a newer adapter with more capacity, so I bought a UZG-01 LAN Coordinator and noticed it had deep MQTT support. The road to MQTT had begun.
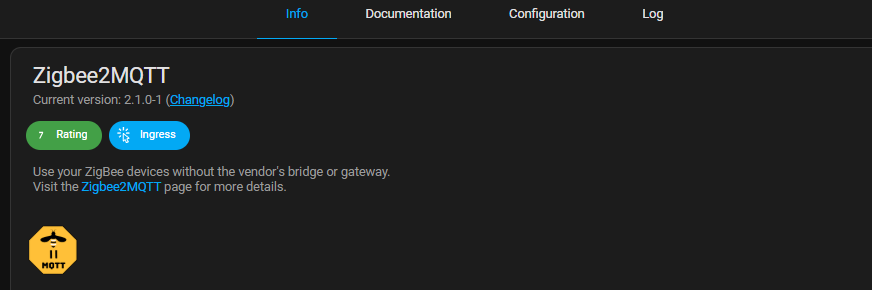
Z2M is an astonishing open source project. Vibrant community, thousands of devices supported, can be installed a myriad of ways, etc. As this was early in my docker experience I opted to install Z2M as an add-on in HA. I did eventually move to docker, we’ll talk about that later.
Installation and Setup
Ok, let’s work out the coordinator first. With the UZG-01, you can go either USB or LAN. I chose LAN. It has a config generator that makes this part incredibly simple. Note that you can can use this config gen for ZHA as well! We’ll use this config snippet to tell Z2M how to find the coordinator later.

Next setup the MQTT connection. Take note of the status indicators in the upper right. When everything is working correctly, all should be green. For initial setup, MQTT/LAN should be green, Zigbee will be red until later.

In HA, find Z2M and install it.
MQTT and serial are the settings we care about. MQTT is the broker that has been configured, and serial is your coordinator. In this case it’s the config from the generator.
NOTE: adapter: zstack is a new requirement as of Z2M 2.0+. The config generator does not create it yet. As Z2M requires a connected socket to the coordinator for “herdsman” to start, if this is wrong startup will fail, and you can see it in the logs. Most adapters I see are “zstack”, others can be “ember”. Just choose the right one for your use case.

Let‘s take a look at the logs during startup.


Once HA has devices that are checked in and published to MQTT, it will then create those entities to use and reference in the MQTT integration for automation. I’m not going to get too deep in how to use entities, as it’s out of scope for this article. All we care about is that they are here. We will go over onboarding devices shortly.

Let’s take a quick look at MQTT Explorer to see how things have changed since our last article.

Now I have two new topics! Z2M, which is the raw details of the endpoints:
And Home Assistant, which have the actual entity states:

Note: the “Home Assistant (MQTT Discovery)” setting in the MQTT section of the UZG allows this part to be automatic.
Overview/Onboarding Zigbee Devices into Z2M
None of this means anything If you have not yet onboarded devices. Z2M has a frontend that we can use to achieve this. In the add-on you can choose to open it from there, and/or pin it to the sidebar.
Definitely pin it to the sidebar, you’ll be in here a lot.
The top left will show how the site is being accessed from within HA. Let’s discuss other important tabs here.

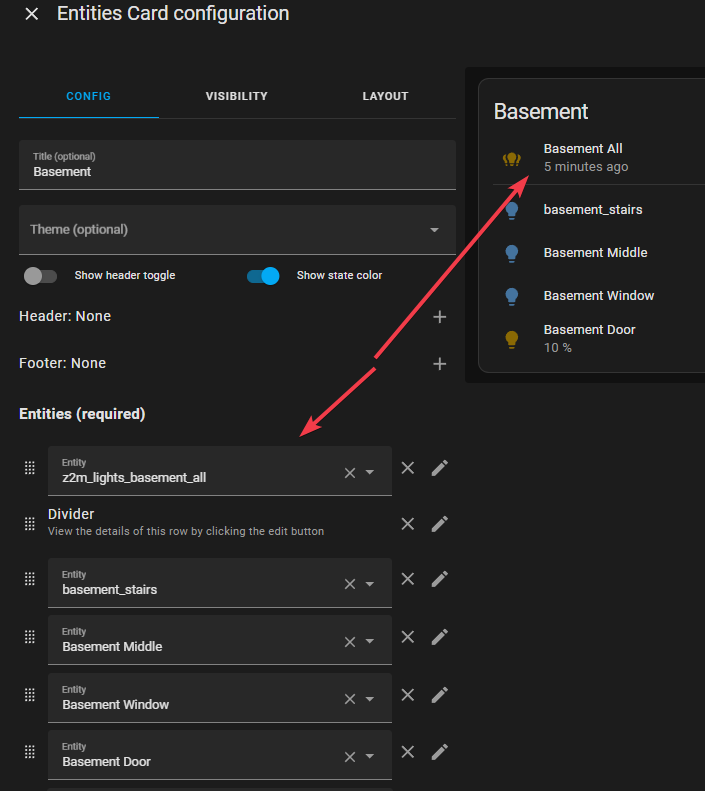
Devices:
This is where you’ll see all the requested devices and their details and status. You can also rename, delete, and re-interview from here.

If you click on the name of the device you’ll get many options. While it’s really interesting to explore, be careful, there be dragons here unless you really know what you’re doing. Options vary wildly depending on device.


It's often safer/easier to manage some of these settings from the HA MQTT integration for the entity. Case in point, the Power On Behavior is exposed. But, you do you.

Dashboard:
This is a control panel for devices. You can control devices outside of HA if you wanted to. In fact you don’t HAVE to use HA at all. It’s just far, FAR easier to use HA to manage them. I don’t think I have ever used this.

MAP:
This will show you the map of all devices and all the links. On large Zigbee networks this can take a while to generate. Protip: Use Firefox for this. It crashes chrome for me every time.

Groups:
In the past, I’ve recommended using HA Helper groups for lights. No more. Zigbee groups are far more effective. With HA groups, when you activate, a signal is sent out for each device. It’s wildly inefficient/noisy. If you have a device in the group that’s been marked offline because it missed a ping, that light will not actuate in HA, even though it is reachable by Zigbee.
With Zigbee groups, each light in the group actually will subscribe to the group itself much like a multicast group. One command will broadcast, and all lights will actuate. It’s also immune from the Z2M availability status, so it will work even though it appears off line and you can’t manually turn the individual on in HA until the status changes.


In rare cases if it’s an actual problem and the device is truly not reachable, then it’ll have to be re-paired. Most times though , a cycle of the physical switch will force it to check in or it’ll check on the next refresh cycle and fix itself.

If you delete and re-pair it will need to be added back to the group however. Let’s look at a group. It’s important to note the group name will be the entity in HA, so name wisely.


And finally, in MQTT:

OTA: (Over The Air Update)
This is one of Z2M’s shining features, OTA. Many lights, outlets, etc can have their firmware updated right from Z2M! My old GE/Cree/Sengled lights can’t but my ThirdReality lights and outlets, blinds, etc can! Once of the first things I do when I onboard a new device is to check if it has an update. When I first started with my new ThirdReality lights they wouldn’t work right with a group or change colors correctly. Turns out it was a firmware issue and once I updated they worked perfectly. Great feature for modern devices.

NOTE: Zigbee is an extremely low bandwidth protocol. It’s kind of the whole point. To that end, OTAs can be a time consuming mission. It can take up to 30+ minutes to send and complete an update, and I wouldn’t recommend doing more than a few at a time. It’s a very noisy process to the mesh and will degrade performance overall until complete. Still well worth the effort though.
Onboarding
Extensions and Touchlink are niche, and logs are self explanatory. Let’s onboard a device. A device needs to be in either an initial or reset state to be added. In Z2M you’ll see “Permit Join” (All). Pressing this will allow devices within range to join your network. It will automatically turn off after four minutes.
Now before you get all button happy let’s hold on a minute. You never want to use “All”. This will join the device to the mesh inefficiently, and will take longer to find it’s most efficient path to the coordinator for stability.
It’s actually a dropdown menu containing all the routers in the network.
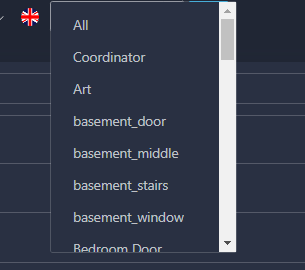
Case in point, for this article I joined a light to the network. An existing light in my office is a router so I chose that and then joined it via that device which has its own connection back to the coordinator. This prevents a lot of churn on the network. So whenever you want to join a device, use the one closest to its final installed position.
Or if you’re lazy just use All. Hey, it’s your network ;)
Once successfully added, its name will be a hexadecimal string. This will also be the entity name in Home Assistant.

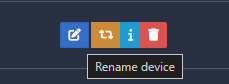
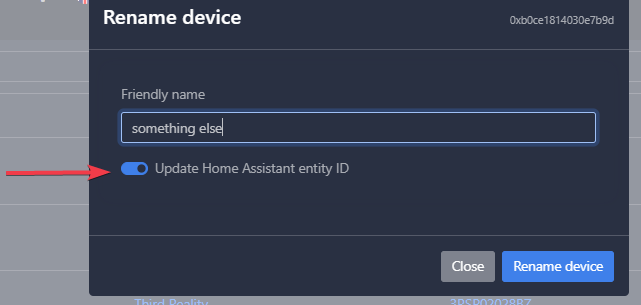
The very next thing you should be is to edit it something that makes sense. Rename the device using the option on the far right:
Ensure you click to update the name in HA, so it changes there as well.
Re-Pairing/Deleting/Re-Adding
Let’s say you have a device that is just misbehaving and you want to reset and re-add it. You can reset it without deleting it as a start. If you reset the device to default (every process is different, consult the manual) all you have to do is then “Permit Join” and it’ll hop right back on as though nothing happened.
If you delete the device, you can still reset and re-join but it will remove all links in Z2M and HA, and come onboard as a hexy little beast. Now here's the neat part. Let’s say you had that device named and it was all over HA and now you’ve got a bunch of ugly “device” not found in your dashboards. Or NodeRed is hollering that an entity no longer exists.
Simple fix. Just rename it the same as before, make sure the update button is checked and then everybody is happy. If the device was a member of a Zigbee group though you will have to go to the group and re-add it.
So, I think that’s it for part two. I’ll do another part soon that covers some other applications that can use MQTT, and cover some neat stuff like integrating notifications into Node Red. And I’ll discuss why/how I moved Z2M to docker.
Until next time.